How to Re-Ink Pad Free and other Pre-Inked Stamps
|
Please follow these simple instructions when re-inking your PadFree stamp. Refill your stamp when you begin to notice the impression fading. Always use PadFree brand ink when re-inking. Other types of ink can ruin your stamp. Be careful not to over-ink! It is better to repeat this procedure within a few days than to over-ink the reservoir which will cause a mess!
Note: Always place a few sheets of scrap paper beneath your stamp while refilling the ink reservoir. The ink used in pre inked stamps may stain surfaces, skin and clothing. Wash your hands with soap and water to remove ink from skin. |
 |
|
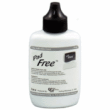
Pad Free Ink | |
|
|
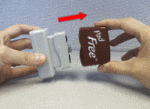
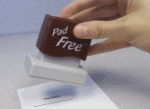
Step 1
Remove the handle of the stamp by grasping the stamp at the top and bottom and firmly pull off. A reasonable amount of force may be required.
|
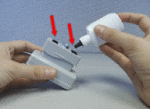 |
Step 2
Add a few drops of ink to each cavity. We recommend adding 3-4 drops to each reservoir for smaller stamps, and 6-8 drops for larger stamps.
|
 |
Step 3
Replace the handle and allow the stamp to rest for approx. 1 hour
while the ink flows through the foam to the surface of the stamp.
|
 |
Step 4
Stamp a few test impressions to make sure ink has migrated to the surface. Repeat the steps above the next day if the stamp still does not appear to be inked enough. |